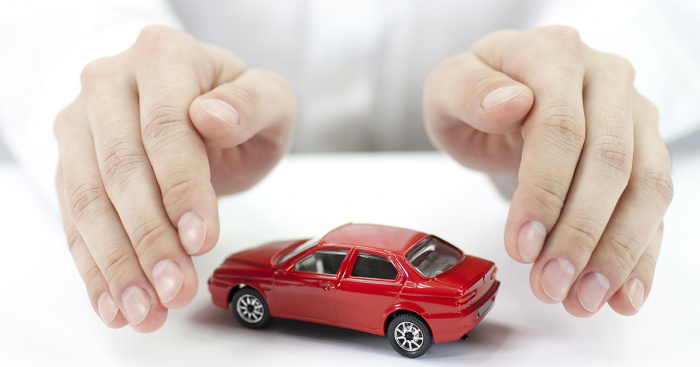
หากคุณเป็นเจ้าของรถยนต์ ประกันรถยนต์นับว่าเป็นสิ่งที่จำเป็นจะต้องทำ ต้องมีเอาไว้ ทั้งนี้ประกันภัยรถยนต์ก็มีหลายประเภทให้เลือก ขึ้นอยู่กับความเสี่ยงหรือต้นทุนราคารถยนต์และความคุ้มครองที่คุณต้องการ รวมทั้งงบประมาณที่เรามีอีกด้วย ตัวอย่างเช่น ประกันรถยนต์ 2+ ที่เป็นทางเลือกเพิ่มเติมสำหรับเจ้าของรถที่ต้องการคุณสมบัติความคุ้มครองเพิ่มเติมจากแผนประกันแบบดั้งเดิมอย่างประกันรถยนต์ 2 การมีประกันภัยรถยนต์จะช่วยให้เจ้าของรถอุ่นใจมากขึ้น เมื่อรู้ว่าตัวเองจะได้รับการดูแลในกรณีที่เกิดเหตุไม่คาดฝันขณะอยู่บนท้องถนน ถ้าต้องการจะเลือกซื้อให้ได้ ประกันรถยนต์ 2+ ราคา เหมาะสมกับความคุ้มครอง ไม่ควรพลาด 3 ตัวเลือกเหล่านี้ เมืองไทยประกันภัย หากกำลังสนใจทำ ประกันรถยนต์ 2+ ราคา ถูกและดี ไม่ควรมองข้ามตัวเลือกแผนความคุ้มครองประกันรถยนต์ 2+ จากเมืองไทยประกันภัย […]
เมื่อเพิ่มความรู้ให้ลูกๆด้วยโปสเตอร์กันเถอะ
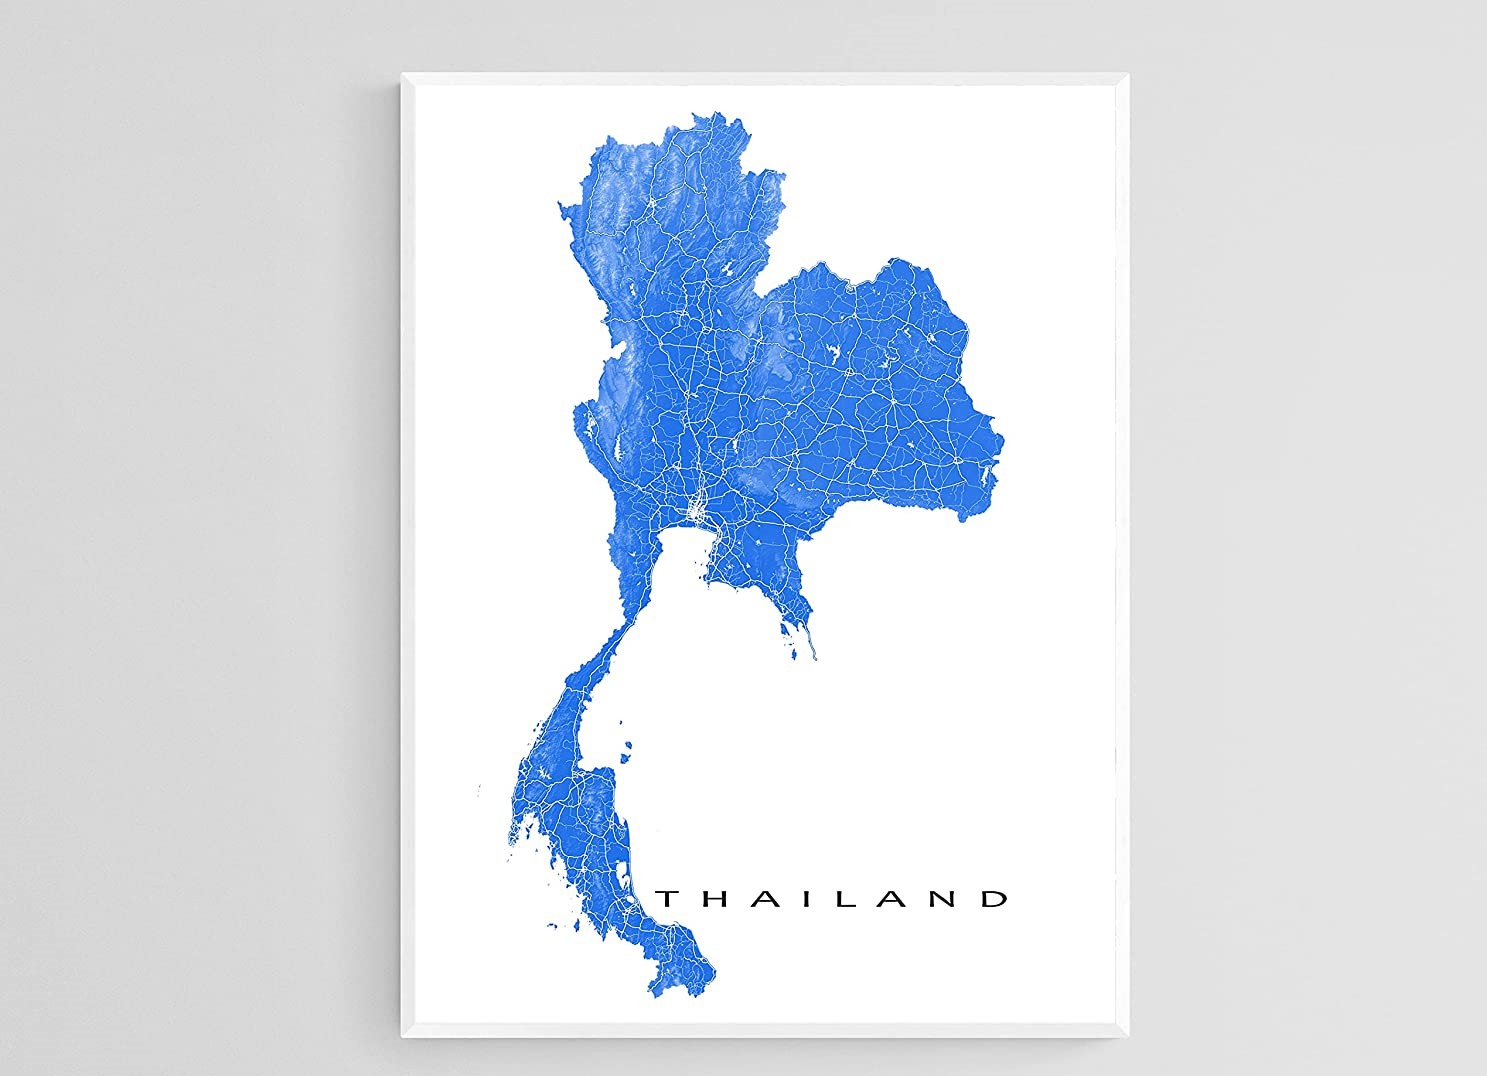
สำหรับการพัฒนาและเสริมสร้างการเรียนรู้ให้กับเด็กๆ นั้นสามารถทำได้หลายอย่าง ไม่ว่าจะเป็นการเรียนการสอน การดูผ่านสื่อต่างๆ แต่วิธีหนึ่งที่เป็นวิธีคลาสสิคและสามารถเพิ่มความรู้ให้กับเด็กๆ ได้นั่นคือ การติดโปสเตอร์เพื่อการศึกษา ประโยชน์ของโปสเตอร์ประเภทนี้คือช่วยกระตุ้นให้เด็กเกิดความสนใจเรียนรู้เรื่องราวต่าง ๆ พร้อมกับจดจำสิ่งที่ต้องเรียนรู้ได้ดี นั่นเอง วันนี้จะขอมาแนะนำโ)สเตอร์เพื่อการศึกษาที่น่าสนใจ เผื่อคุณพ่อคุณแม่จะเอาไปแปะไว้ที่ห้องนอนของลูกๆ แผนที่ประเทศไทย นับว่าเป็นหนึ่งในความรู้พื้นฐานที่เด็กๆ ควรจะรู้ไว้ ตอนเด็กๆ อาจจะจำไม่ได้ทั้งหมด แต่ถ้าหากเราซึบซับไปในทุกวัน ก็คงจะจำได้อย่างแน่นอน ผู้ใหญ่บางคนสมัยนี้ยังไม่ทราบดว้ยซ้ำว่าจังหวัดไหนอยู่ภาคอะไร ดังนั้นการแปะโปสเตอร์แผนที่ประเทศไทย จะช่วยกระตุ้นเกี่ยวกับความจำได้เป็นอย่างดี โปสเตอร์ตัวอักษร ไม่ว่าจะเป็นภาษาไทย หรือภาษาอังกฤษ ก็สามารถเสริมสร้างยความรู้ให้กับเด็กๆ ได้ โดยให้เขาท่องอย่างน้อยวันละ 1 […]
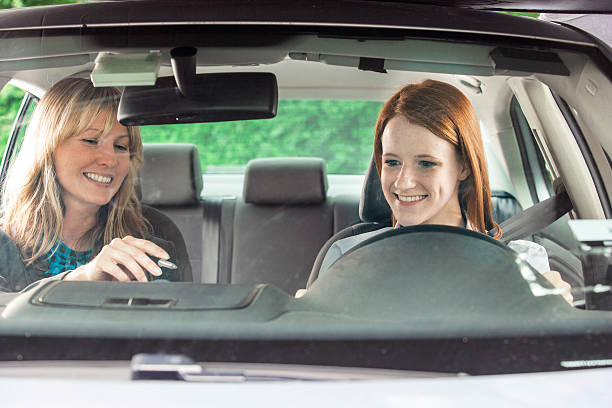
เบี้ยประกันภัยรถยนต์ ชั้น 1 ไม่ได้แพงอย่างที่คิด
หลายคนอาจคิดว่าเบี้ยประกันภัยรถยนต์ ชั้น 1 ต้องแพง เพราะความคุ้มครองสูงสุด และครอบคลุมความเสียหายที่อาจเกิดขึ้นหลายอย่าง ทั้งความเสียหายต่อชีวิตและทรัพย์สินของผู้ทำประกันเอง และรถคู่กรณีด้วย รวมทั้งยังคุ้มครองความเสียหายที่อาจเกิดขึ้นจากภัยธรรมชาติ ไฟไหม้ และยังรวมถึงคุ้มครองกรณีที่รถสูญหายจากการโจรกรรมอีกด้วย เนื่องจากคุ้มครองเยอะ จึงทำให้หลายท่านเข้าใจผิดว่าเบี้ยประกันภัยรถยนต์ ชั้น 1 จะต้องแพงตามไปด้วย ความจริงเบี้ยประกันภัยรถยนต์ ชั้น 1 ไม่ได้แพงอย่างที่คิด บริษัทประกันภัยรถยนต์หลายแห่งสามารถให้ลูกค้าผ่อนชำระได้ถึง 10 งวด เช่น รู้ใจประกันภัย อีกทั้งยังมีส่วนลดมากมายให้ลูกค้า เช่นลด 10 % ในกรณีที่ลูกค้าติดกล้องหน้ารถ […]
แร่ธาตุที่ถูกใช้ในงานศิลปะไทยมีอะไรบ้าง
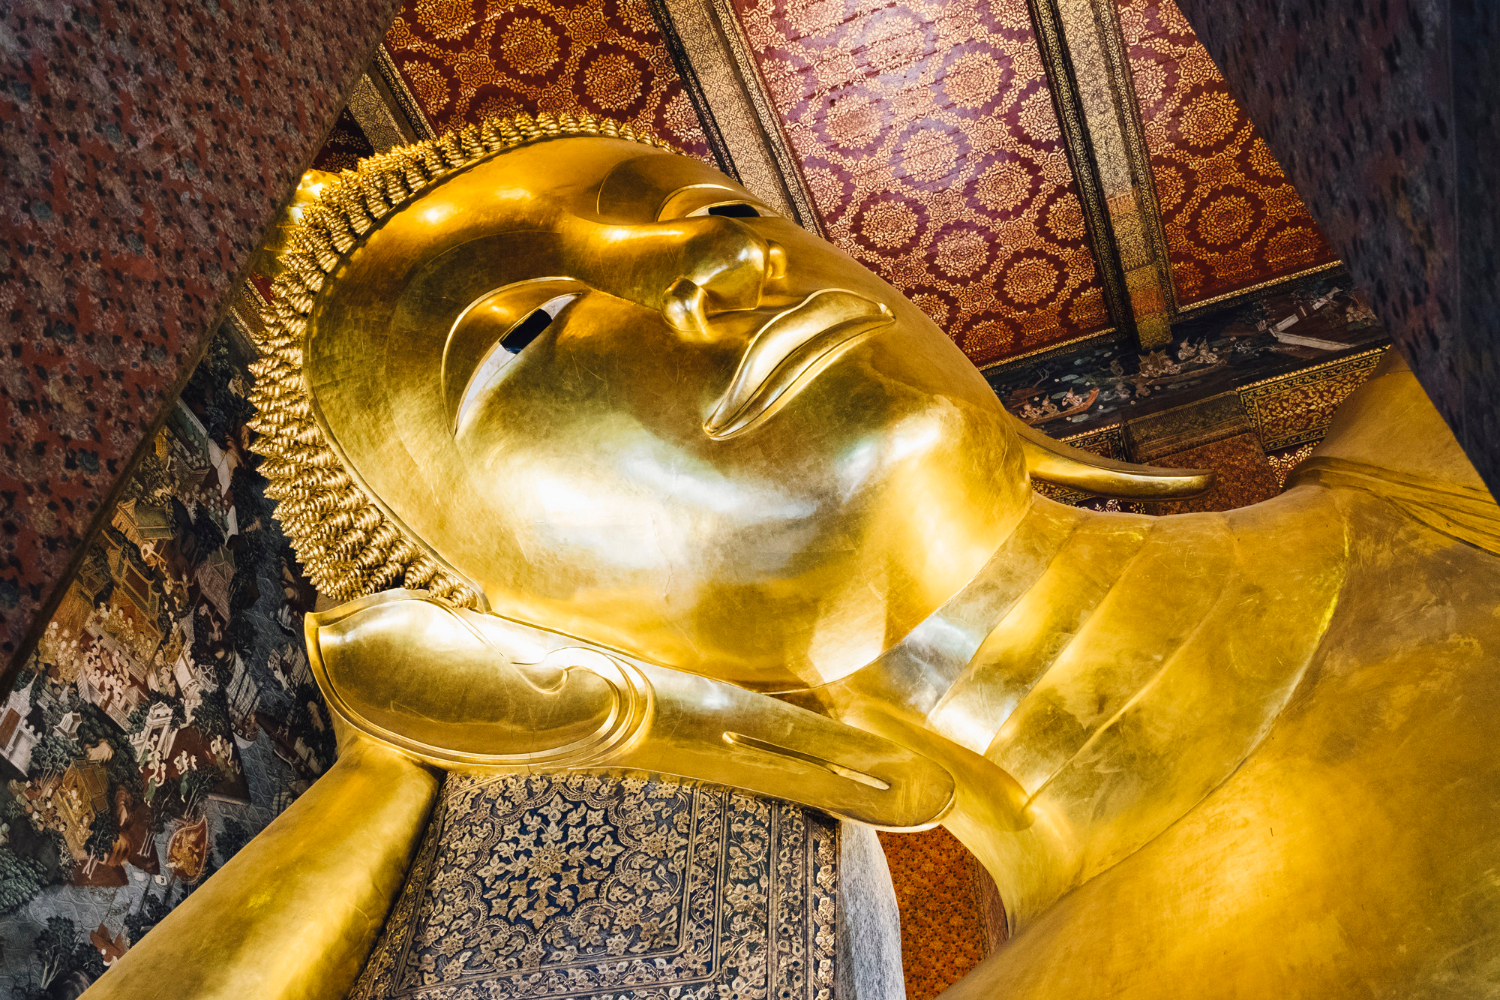
ตามหลักการพัฒนาของมนุษย์ทางศิลปะ ย่อมนำเครื่องไม้เครื่องมือหรือสิ่งต่างๆที่ได้พัฒนากันขึ้นมาแล้วในโลกมนุษย์ นำมาประกอบสร้างเป็นงานศิลปะกันทั้งนั้น แร่ธาตุที่ขุดได้จากดินก็เป็นส่วนหนึ่งที่มักถูกขุดหาขึ้นมาประกอบกันขึ้นเป็นองค์พระพุทธรูป หรือ งานประติมากรรม งานหัตถกรรม ประณีตศิลป์ต่างๆเนื่องในศาสนาตามความเชื่อโบราณของแต่ละกลุ่มชนอยู่เสมอ เช่นเดียวกันกับในงานศิลปะไทยที่มักจะนำแร่ธาตุเหล่านั้นมาหล่อขึ้นเป็นงานประติมากรรมที่ตอบสนองสังคมพุทธศาสนาอยู่นั้นเอง ดังนั้น ในวันนี้ เราจะมาทำความรู้จักกับแร่ธาตุต่างๆที่ถูกนำมาใช้ในงานศิลปะทางศาสนากันบ้าง ว่าจะมีแร่ธาตุตัวใดที่ช่างโบราณมักนำมาใช้ประกอบสร้างขึ้นเป็นงานศิลปะขึ้นมาได้ แล้วแต่ละตัวมีลักษณะ รูปร่าง คุณสมบัติแตกต่างกันไปอย่างไร ไม่ให้เป็นการเสียเวลาเรามาเริ่มกันที่แร่ธาตุตัวแรกอย่าง ทองเหลือง ซึ่งเป็นโลหะเจือชนิดหนึ่ง ประกอบด้วยทองแดงและสังกะสี เป็นโลหะสีเหลือง มำนักมาหล่อเป็นเครื่องมือ เครื่องใช้ ตัวต่อมาที่อาจจะเรียกได้ว่าเป็นวัตถุดิบสำคัญในงานศิลปะไทย ได้แก่ ทองแดง เป็นโลหะสีแดง […]
ศิลปะเป็นสิ่งที่หลายๆคนให้ความสนใจกันอย่างมากมาย
ในเรื่องของศิลปะนั้นก็เป็นเรื่องที่ดีอย่างมากเลยที่เราเองก็ควรที่จะต้องให้ความสนใจกันอย่างมากที่สุดด้วยจะยิ่งดีเพราะว่าในเรื่องของศิลปะนั้นจะช่วยทำให้เรายิ่งมีความสุขในชีวิตได้เพราะว่าศิลปะนั้นก็เป็นสิ่งที่หลายๆคนก็มักที่จะให้ความสนใจเพราะว่าได้แสดงออกถึงจินตนาการและความคิดของเราให้ยิ่งมีความสมบูรณ์และออกมาเป็นจริงได้อย่างมากด้วย เพราะศิลปะนั้นมีหลายอย่างให้เราได้เลือกทำกันดังนั้นหากเราอยากที่จะชื่นชอบในศิลปะทางด้านของการประดิษฐ์แล้วนั้นเราก็จะต้องตั้งใจที่จะประดิษฐ์ผลงานออกมาให้สวยงามด้วยเพราะความตั้งใจจะช่วยส่งผลให้มีผลงานที่ออกมาดียิ่งขึ้นด้วย อย่างน้อยในเรื่องของศิลปะนั้นจะช่วยทำให้เราไม่ต้องมีความเครียดอีกด้วยและทำให้เราสามารถที่จะคิดในเรื่องราวต่างๆได้อย่างมากมายเลยและแน่นอนว่าเรื่องของศิลปะนั้นหากเรายิ่งให้ความสนใจมากเท่าไหร่ก็จะดีต่อเราเองอย่างที่สุดอย่างน้อยความพยายามของเราก็จะส่งผลช่วยให้เรายิ่งมีความสุขและมีฝีมือที่ดีได้ นอกจากนี้ศิลปะจะช่วยจรรโลงใจให้เรานั้นไม่ต้องจมอยู่กับความทุกข์ใจด้วยเพราะว่าศิลปะนั้นเป็นสิ่งที่มีความสวยงามหากเรายิ่งให้ความสนใจกับเรื่องของศิลปะแล้วก็จะช่วยทำให้เราได้เก็บเกี่ยวประสบการณ์ที่ดีๆได้มากยิ่งขึ้นด้วย และในเรื่องของศิลปะนั้นก็จะยิ่งเป็นสิ่งที่มีคนให้ความสนใจกันอย่างมากมายด้วย เนื่องจากว่าศิลปะสามารถที่จะทำให้เกิดรายได้ขึ้นมาได้เพราะฝีมือของคนเรานั้นเมื่อได้สร้างสรรค์ออกมาแล้วมีความสวยงามก็มักเป็นที่ต้องตาของคนที่ชอบแบบเดียวกับเราดังนั้นก็จะมีคนสนใจและมาขอซื้อสินค้ากันจำนวนมากด้วยและที่สำคัญก็สามารถที่จะช่วยสร้างให้เป็นรายได้ของตนเองได้อีกด้วย อาจจะทำขายทางอินเตอร์เน็ตก็ได้อีกเหมือนกันเพราะศิลปะไม่ได้ส่งผลร้ายแต่กลับทำให้เราได้หลายอย่างไม่ว่าจะเป็นในด้านของการฝึกสมองด้านของความคิดและด้านของความรู้สึกต่างๆ ด้านอารมณ์ต่างๆก็จะใจเย็นมากขึ้นด้วย เรื่องนี้จึงเป็นเรื่องที่เราเองก็ควรที่จะต้องอย่ามองข้ามผ่านไปเลยจะดีที่สุด และถ้าหากเรามองข้ามไปแล้วโอกาสที่มีนั้นอาจจะเสียไปได้อีกด้วย อะไรที่จะช่วยทำให้เราได้ฝึกฝนตัวเองและสร้างรายได้ให้กับเราเองแล้วนั้นก็จะยิ่งเป็นเรื่องที่ดีกับเราเองอย่างมากด้วยเช่นกันเพราะศิลปะเป็นสิ่งที่สวยงามซึ่งใครๆก็นิยมให้ความสนใจกันอย่างมากในเรื่องของจินตนาการที่สร้างสรรค์ผลงานที่แปลกใหม่ด้วยนั้นเอง
ศิลปะทำให้เราได้ฝึกจินตนาการให้เป็นจริงขึ้นได้
ในปัจจุบันนี้เรื่องของศิลปะนั้นก็เป็นเรื่องหนึ่งที่เราเองก็ควรที่จะต้องยิ่งให้ความสนใจกันอย่างมากที่สุดด้วยจะยิ่งดีเพราะว่าในเรื่องของศิลปะนั้นจะทำให้เราได้สามารถที่จะใช้ความคิดของตนเองออกมาให้ดีมากยิ่งขึ้นได้อีกด้วยและที่สำคัญศิลปะก็จะทำให้เรานั้นได้รู้จักที่จะคิดและแสดงออกในเรื่องราวต่างๆได้อย่างมากมายเลย เราจึงควรที่จะต้องให้ความสนใจกับเรื่องของศิลปะให้มากๆด้วยจะยิ่งดีเพราะถ้าหากเราได้ให้ความสนใจไปแล้วนั้นก็เป็นสิ่งที่ดีที่จะช่วยทำให้เราได้วาดภาพออกมาจากจินตนาการของตนเองให้ออกมาสวยงามอย่างที่สุดด้วยและในเรื่องของศิลปะนั้นอาจจะยากในตอนแรกแต่ถ้าหากเรายิ่งได้เรียนรู้ในทุกๆวันหรือได้ฝึกในทุกๆวันแล้วนั้นก็จะช่วยทำให้เรามีความสุขอย่างมากเลย การที่เราสร้างสรรค์ผลงานศิลปะออกมาจากความคิดแล้วนั้นก็เป็นเรื่องที่ดีเพราะว่าทุกๆอย่างที่ออกมานั้นก็ออกมาจากความคิดของเราเองอย่างยิ่งด้วยเราจึงควรที่จะต้องให้ความสนใจกันให้มากๆด้วยจึงจะดีอย่างที่สุดและนอกจากนี้หากเราได้ให้ความสนใจไปแล้วก็จะช่วยทำให้เรานั้นเกิดแต่เรื่องราวที่ดีๆขึ้นอย่างที่สุดเลย อย่างน้อยเราคิดอะไรได้วาดออกมาอันนั้นก็คือผลงานของเราเองอย่างยิ่งด้วย เรื่องนี้จึงเป็นเรื่องที่เราเองก็ควรที่จะต้องให้ความสนใจและคำนึงถึงให้มากที่สุดด้วยเพราะหากเราได้ตั้งใจที่จะสร้างสรรค์ผลงานออกมาแล้วนั้นจะทำให้เราอาจจะเป็นที่ชื่นชมของคนที่ชอบในผลงานของเราก็ได้อีกด้วย ดังนั้นศิลปะจึงจะเป็นเรื่องที่จะช่วยทำให้จินตนาการของเรานั้นเป็นจริงได้ถ้าหากเราลงมือทำและสร้างสรรค์ผลงานนั้นออกมาเลย หากเราไม่รู้จักที่จะสร้างสรรค์ผลงานนั้นๆออกมาแล้วก็จะเป็นเรื่องที่เราพลาดโอกาสที่จะแสดงฝีมือไปได้อย่างมากเลย เพราะในเรื่องของศิลปะนั้นจะช่วยเสริมสร้างจินตนาการที่ดีให้กับเราเองได้อย่างมากมายเลยดังนั้นเราจึงควรที่จะต้องให้ความสนใจและใส่ใจให้มากๆด้วยจะดีที่สุดเพราะหากเราได้เรียนรู้หรือได้เปิดประสบการณ์ในการหาตัวอย่างในการสร้างผลงานทางศิลปะแล้วก็จะทำให้เราเป็นคนที่เก่งมากขึ้นไม่ว่าเราจะวาดฝันอะไรเราก็สามารถที่จะทำฝันหรือจินตนาการให้ออกมาได้ด้วยศิลปะ เราจึงควรที่จะต้องหมั่นที่จะต้องตั้งใจและมีความพยายามให้กับตนเองให้มากที่สุดด้วยจะยิ่งดีเพราะยิ่งเรานั้นมีจินตนาการที่ดีได้มากเท่าไหร่ก็จะทำให้เราไม่หยุดที่จะพัฒนาตนเองเพราะเราก็จะคิดว่าสิ่งที่คิดไปเรื่อยๆจนเป็นรูปเป็นร่างและประสบความสำเร็จอย่างที่สุดด้วยนั้นเอง